My plans to post weekly blog entries sadly came to nothing, as I was unable to access the internet during the week whilst on my placement. After the placement ended, I had a catastrophic PC failure, losing a lot of work already done in the process. Finally, a replacement laptop and with time to spend going through all my photographs, I'm putting it all together.
The projects that follow don't necessarily appear in order, as I've grouped my photos together even though time elapsed between stages of work on certain pieces.
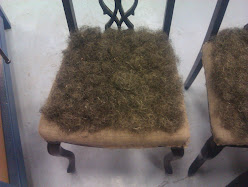
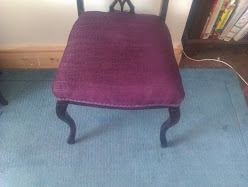
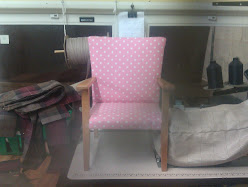
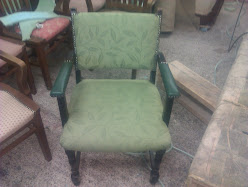
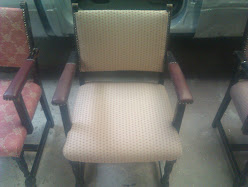
Dining Room Chairs:
For example, one of my own projects, undertaken at the upholstery evening class - a pair of lovely old dining room chairs, completed over a few weeks at the class.
 |
Webbed, ready for the hessian to be added.

After stretching hessian over the webbing and tacking it into place (using traditional techniques and materials), I made a roll edge using hessian and coir, overlapping the edge slightly and about an inch high to create a flat seat with a firm edge. This was then filled in with coir, before stretching hessian over the lot, firmly pressing the coir down until just above the level of the rolled edge.
|
 |
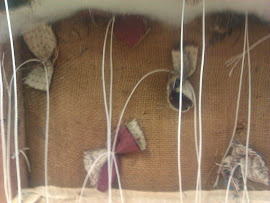
Continuous lines of stitches sewn with a long double ended needle compresses the stuffing (as in the photo above) when pulled as tightly as possible. This helps to flatten the stuffing until it's level with the top of the rolled edges.
 |
Of course, pulling the stitches tightly creates 'dimples' which, in turn, need to be filled in with horsehair. The filling restores a nice flat, even surface and cotton wadding, placed over the hair prevents coarse hairs from sticking out through the fabric.
|
|
 |
Hundreds of tacks later (well, that's how it felt at the time), I was pleased with the even finish all round. I had to ensure that the seat was as tight as possible, whilst ensuring that the weave was straight in both directions. I also had to ensure that I kept the tacks in a line, above the level of the show wood.
|
 |
The final step was to apply a braid to cover the tacks - and deliver them to my son as a gift.
|
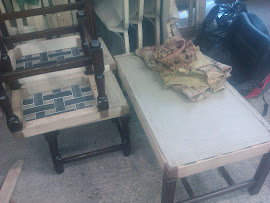
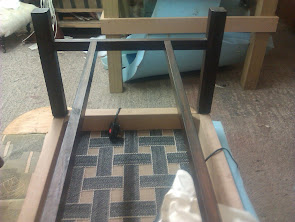
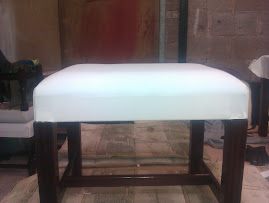
Five Stools:
A local joiner brought in 5 stools (frames only) of various sizes to be upholstered. First, I webbed them all and then cut and stuck the foam in place.
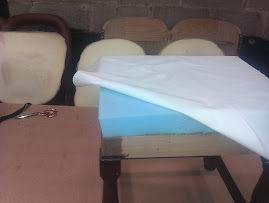
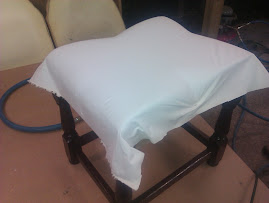


 The joiner didn't know whether or not his material was fire retardent so the next step was to cover each stool with fire retardant schedule 3 interliner. I used this as an opportunity to perfect my techniques, including doing the corners as well as I would do the final fabric covers. The square edges of the foam were rounded off by pulling the liner round and stapling under pressure, being careful to ensure there was a smooth, evenly rounded, matching edge on all four sides of each stool, with no bumps. I was relying as much on feel as on eye to achieve this and having five to do was was excellent practice.
After attaching the final fabric and doing the corner pleats, I added the tassels, using a hot glue gun - easier said than done! Glueing has to be done about 3 inches at a time, being careful to avoid getting glue anywhere it shouldn't be and spacing the tassels well. I wanted to ensure the corners were identical. Steve, the customer and I were all pleased with the results.
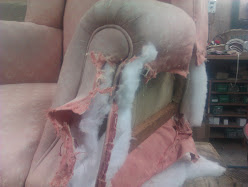
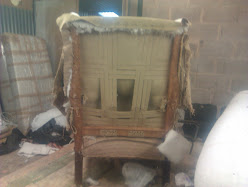
Armchair:
The best way to learn how to upholster an armchair is to 'rip off' the old covering. I did a lot of this and learned the importance of taking a minimum of one before photograph, although I usually took several. It's a good idea, especially for unusual features, or to show how the arms were finished, how many pleats, etc.
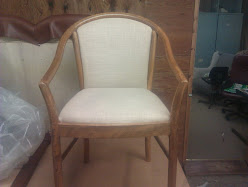
Smaller Chair:
One of my next jobs was a small chair, with a back which slotted into the frame. I took photographs of the ways it had been put together, to help with reassembly.
 |
The original fabric was a thin cotton and it was being replaced by a thicker fabric. I guessed it might be harder to put back together into the frame afterwards, and it was. |

Ullswater Steamer:
Another transport project - one of the Ullswater Steamers required 50+ seats reupholstering. Stripping them was a mission, shared between two of us, but I did the upholstery myself. The seat backs had a central 'dimple', achieved by a fly sewn to the back of the cover and pulled through a slot in the seat back, before securely stapling it in place.
Next, the cover itself had to be pulled over the back and securely stapled, taking care to get an even, tight fit around the edges, with no pleats or bumps.
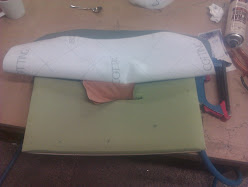
Child's Chair:
And now for something completely different: a child's chair. After stripping the old covers off and replacing the foam as necessary, I sanded the wooden frame and applied several coats of matt Danish Oil, until it had a pleasing finish. The next step was to cut out the fabric pieces for the chair, after carefully measuring. My mantra is 'Measure twice, cut once' although I think I probably measured more times than that.
As I fitted the new cover pieces, I took great care over my cuts around the arms and legs - you can always cut a little more, but you can't undo a cut taken too far.
The Sewing Machine:
Major excitement: my own industrial sewing machine. It weighs a ton! This will be useful. It's going to take some getting used to - very different from my little domestic machine.
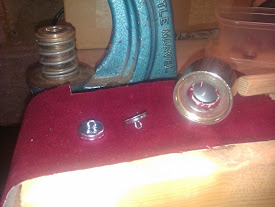
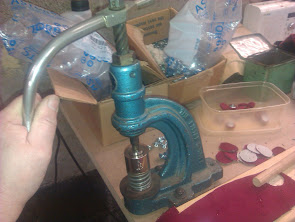
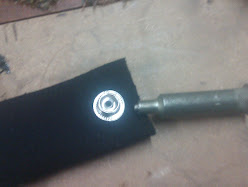
Press Studs:
Another useful skill: fitting press studs. Margaret (the seamstress at the workshop) had to make a hood cover for a vintage car, out of double layer waterproof canvas. It needed press studs to fasten it and that was my job. We had the tools and studs but I had to work out the method. I'm now the resident expert, having made myself drawings of the tool to do each stage of the process and a sample piece to use as a guide in future.
Pub Chairs:
Another job was a set of chairs for a pub. They'd originally been plain wood, but now had to have padded seats, backs and arms. The landlord wanted leather arm rests, with studs. I made a prototype for his approval and took lots of photographs, to ensure subsequent ones would be exactly the same. They were part of a total 'refurb' of the pub seating, done by myself and others at the workshop.
After that, another pub and another job: 18 wooden chairs needing padded seats and studs.
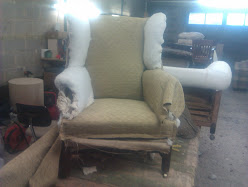
Antique Wing Back Armchair:
And now for something completely different: a beautiful antique wing back armchair, complete with all its original stuffing. I discovered just how hard it is to re-use the old wadding (as the customer wanted) and get a smooth finish. Some dacron had to be added to smooth out the lumps and bumps, inevitably, and I had to spend ages working on it. Not as easy as it looks! Good experience though, measuring the chair to cut out the fabric, sew on the flies and fit it all on the chair. As always, the cuts for fitting are the most nerve wracking part of the job.
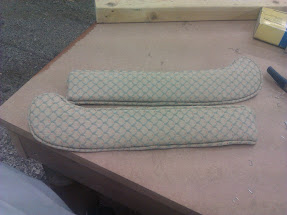
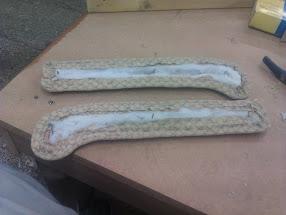
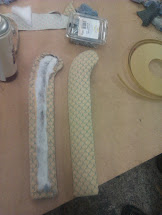
Many armchairs have 'hockey sticks' on the front of the arm - fabric covered hardboard or wood panels, which cover the staples where the inside and outside arm pieces are attached. These have to be made, re-using the original form, covered with the new fabric.
Headboards:
A designer commissioned a large headboard for a client and, having helped make it I had the job of applying about 250 matt nickel studs around the edge. It was a challenging job, as each had to be carefully placed so that they were touching each other and absolutely straight. It looked very impressive.
Another headboard for another designer. Wool is very fashionable for upholstery at the moment, as well as being a good aesthetic and practical choice. 100% wool fabric is inherently fire retardant, hard wearing and beautiful to work with.This headboard was in dark charcoal grey, a bit like an army blanket I thought, but the velvet buttons we made really made an impact!
Working in a workshop providing a service to designers has been really interesting and inspirational. It's made me want to create 'statement' pieces when upholstering furniture I've bought to sell - such as a vintage Model 749 Parker Knoll chair and a 1950s TV chair - keeping in mind the philosophy that sometimes 'less is more'.
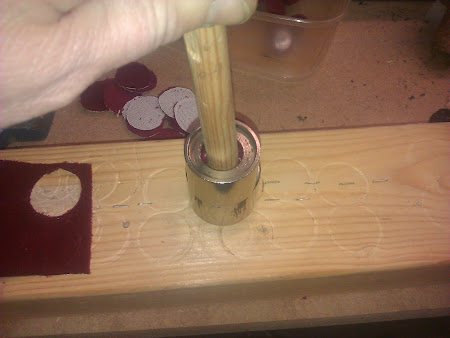
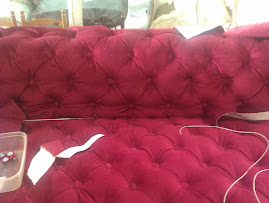
Deep-Buttoned Antique Chaise Longue:
Speaking of buttons: Steve re-covered an antique chaise longue in deep red moleskin velvet and I made the 154 buttons. The deep buttoning was a 2 person job and I was the 2nd person. We got a good system going with 2 needles to speed up the process.
.
 |
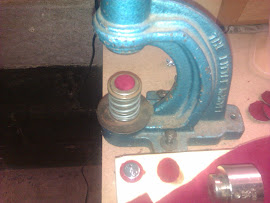
Making buttons using the hand button machine |
I've discovered that I really enjoy hand sewing and feel a real sense of pride in being able to sew up a back seam using a dark thread on a light fabric and it being completely unseen.
My next post will be devoted to the Greasley train carriage - the reason I was given my training placement in the first place.

 I've just had a great 3 days demonstrating the upholstery skills I've
learned at the HSI Festival. Friday was an education day, visited by lots
of school groups. I took along materials and tools used in traditional
and modern upholstery and demonstrated the use of them all. Having
taught, I really enjoyed the day. Saturday and Sunday were both very
busy, with hundreds of people attending the Tynemouth Market. I managed
to buy a TV chair and a footstool for £7 and £6 respectively - my latest
projects. On Sunday, I had my own apprentice - a woman who chatted to me
on Saturday and wanted to have a go at upholstery. I started her off
stripping my TV chair, having explained that it's a really good way to begin
learning. She also had a go at putting an interliner on a vintage 1960s
stool top, using my stapler. She was still enthusiastic at the end of the
day, so hopefully she'll do the training she's identified.
I've just had a great 3 days demonstrating the upholstery skills I've
learned at the HSI Festival. Friday was an education day, visited by lots
of school groups. I took along materials and tools used in traditional
and modern upholstery and demonstrated the use of them all. Having
taught, I really enjoyed the day. Saturday and Sunday were both very
busy, with hundreds of people attending the Tynemouth Market. I managed
to buy a TV chair and a footstool for £7 and £6 respectively - my latest
projects. On Sunday, I had my own apprentice - a woman who chatted to me
on Saturday and wanted to have a go at upholstery. I started her off
stripping my TV chair, having explained that it's a really good way to begin
learning. She also had a go at putting an interliner on a vintage 1960s
stool top, using my stapler. She was still enthusiastic at the end of the
day, so hopefully she'll do the training she's identified..bmp)


